

PingCAP is happy to announce the collaboration with ILLA, a low code open source tool for developers to develop applications rapidly. Integrating TiDB Cloud and ILLA Builder can help developers build tools and applications quickly while meeting the high requirements for data consistency, reliability, availability, scalability, and disaster tolerance.
ILLA has a well-designed built-in UI components library. Developers can drag and drop these components to create specific tools. ILLA provides the following features:
- A fully responsive UI library
- Integration with any data sources
- A high degree of freedom to implement rich functionality
- Collaboration with any developers at any time.
- Flexible deployment: either self-hosted or ILLA Cloud service
In this tutorial, we will show you how to set up a TiDB cluster and build an administration panel that allows you to create, read, update, and delete entries. We’ll display the data in a table, and use a panel to tab between creating and updating forms. We’ll do all this in less than 10 minutes.
Create a free cluster on TiDB Cloud
To create a cluster on TiDB Cloud:
- Sign in with your TiDB Cloud account. If you are a new user, sign up for an account.
- Create a free cluster and connect to it. After running the sample application, you will get the TiDB connection information, including the server name, port number, database name, user name, and password. Be sure to make a note of these; you’ll be using them in later steps.
Connect to TiDB with ILLA Builder
Now that you have a free TiDB Cluster, it’s time to connect it to the ILLA Builder.
- On the ILLA Builder welcome page, create a free account and sign in.
- Create a new application.
- Connect to TiDB as an ILLA resource. Do one of the following:
- If you have an existing PingCAP resource in ILLA Builder, click + New to select it.
- If you don’t have a TiDB resource in the ILLA builder, click + New Resource to set up a new connection.
- Test the new connection. If the connection is successful, save the connection as a new resource.
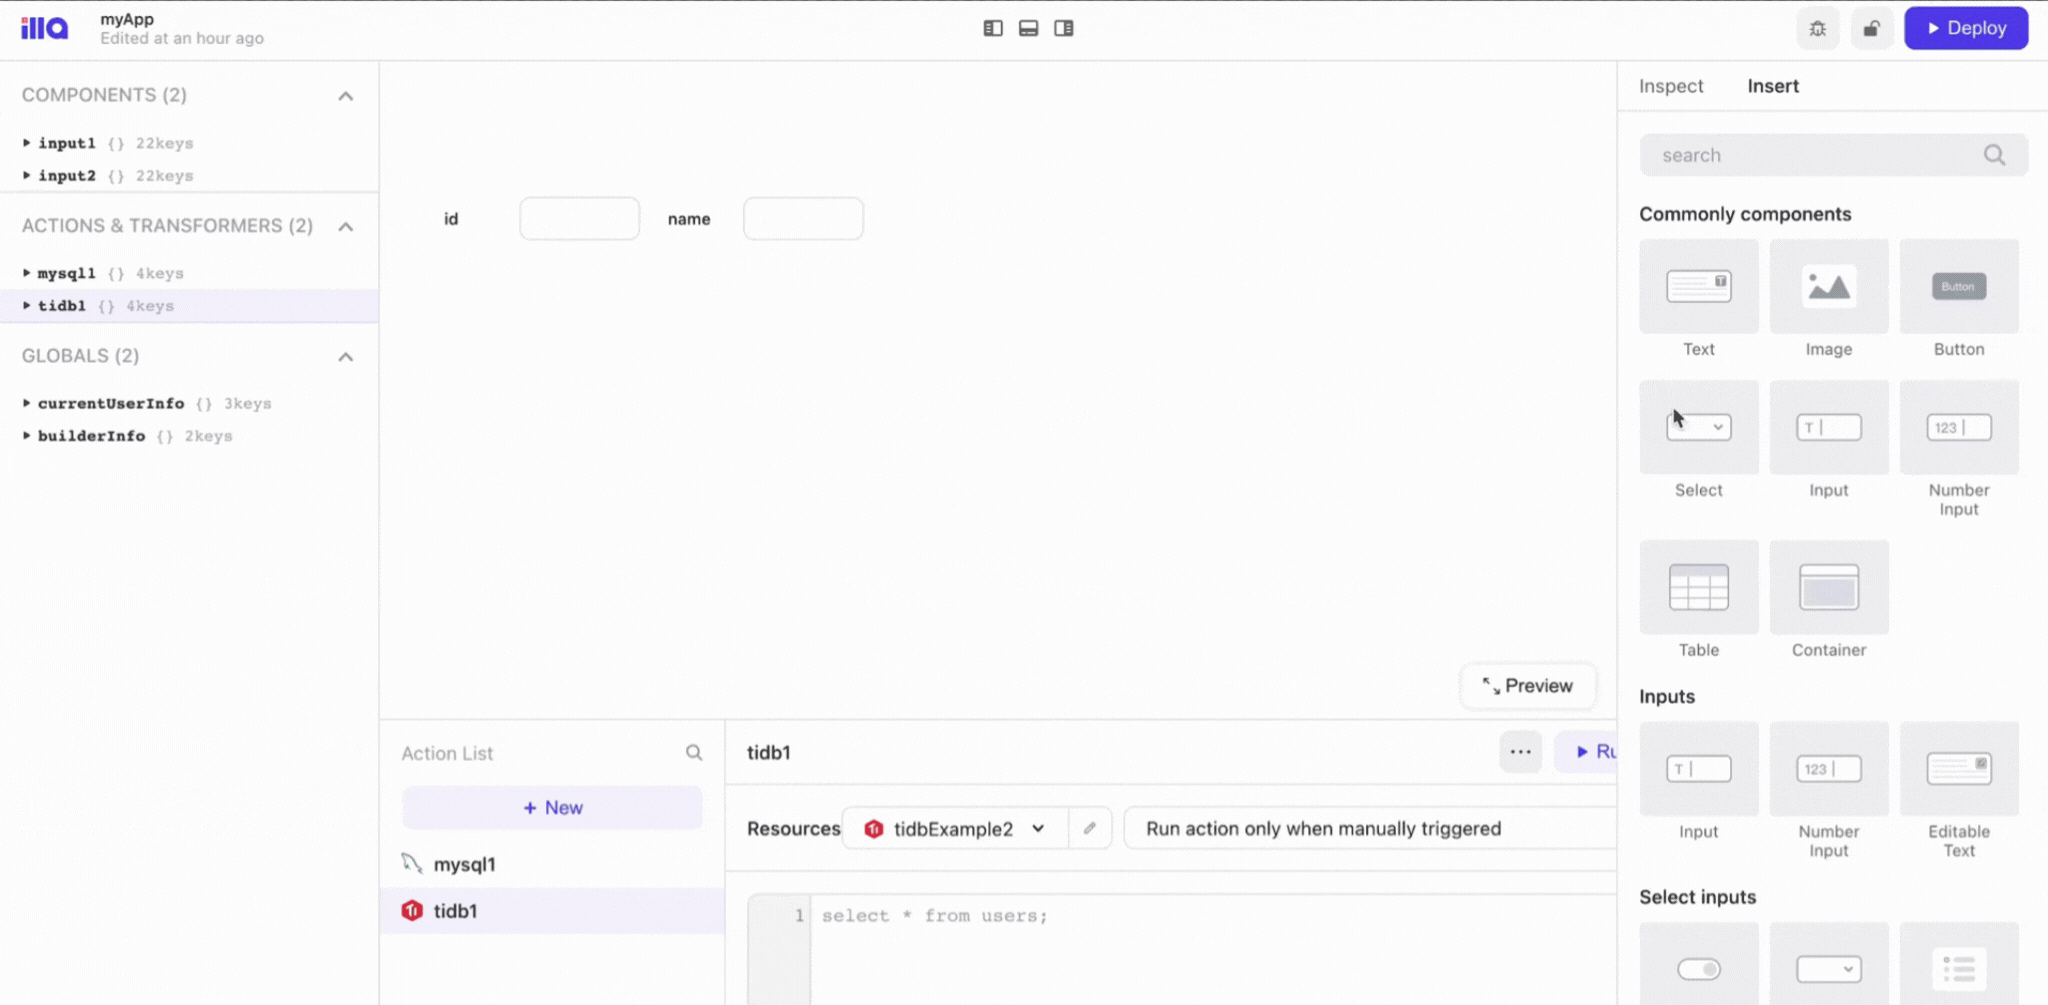
- Use actions to execute basic create, read, update, and delete (CRUD) operations in the TiDB database. Actions are the bridge between data and ILLA components.
- Choose a TiDB resource and create actions.
- In the input box, enter the SQL statement, save it as a new action and run it.
- Click Run to execute the statement.
- Run a query action to see if the insert action runs successfully.
You can create multiple actions and use different components to control their execution.
Connect the component to the action
Components in ILLA Builder are built-in front-end UI libraries such as buttons and input boxes. To connect a component to an action:
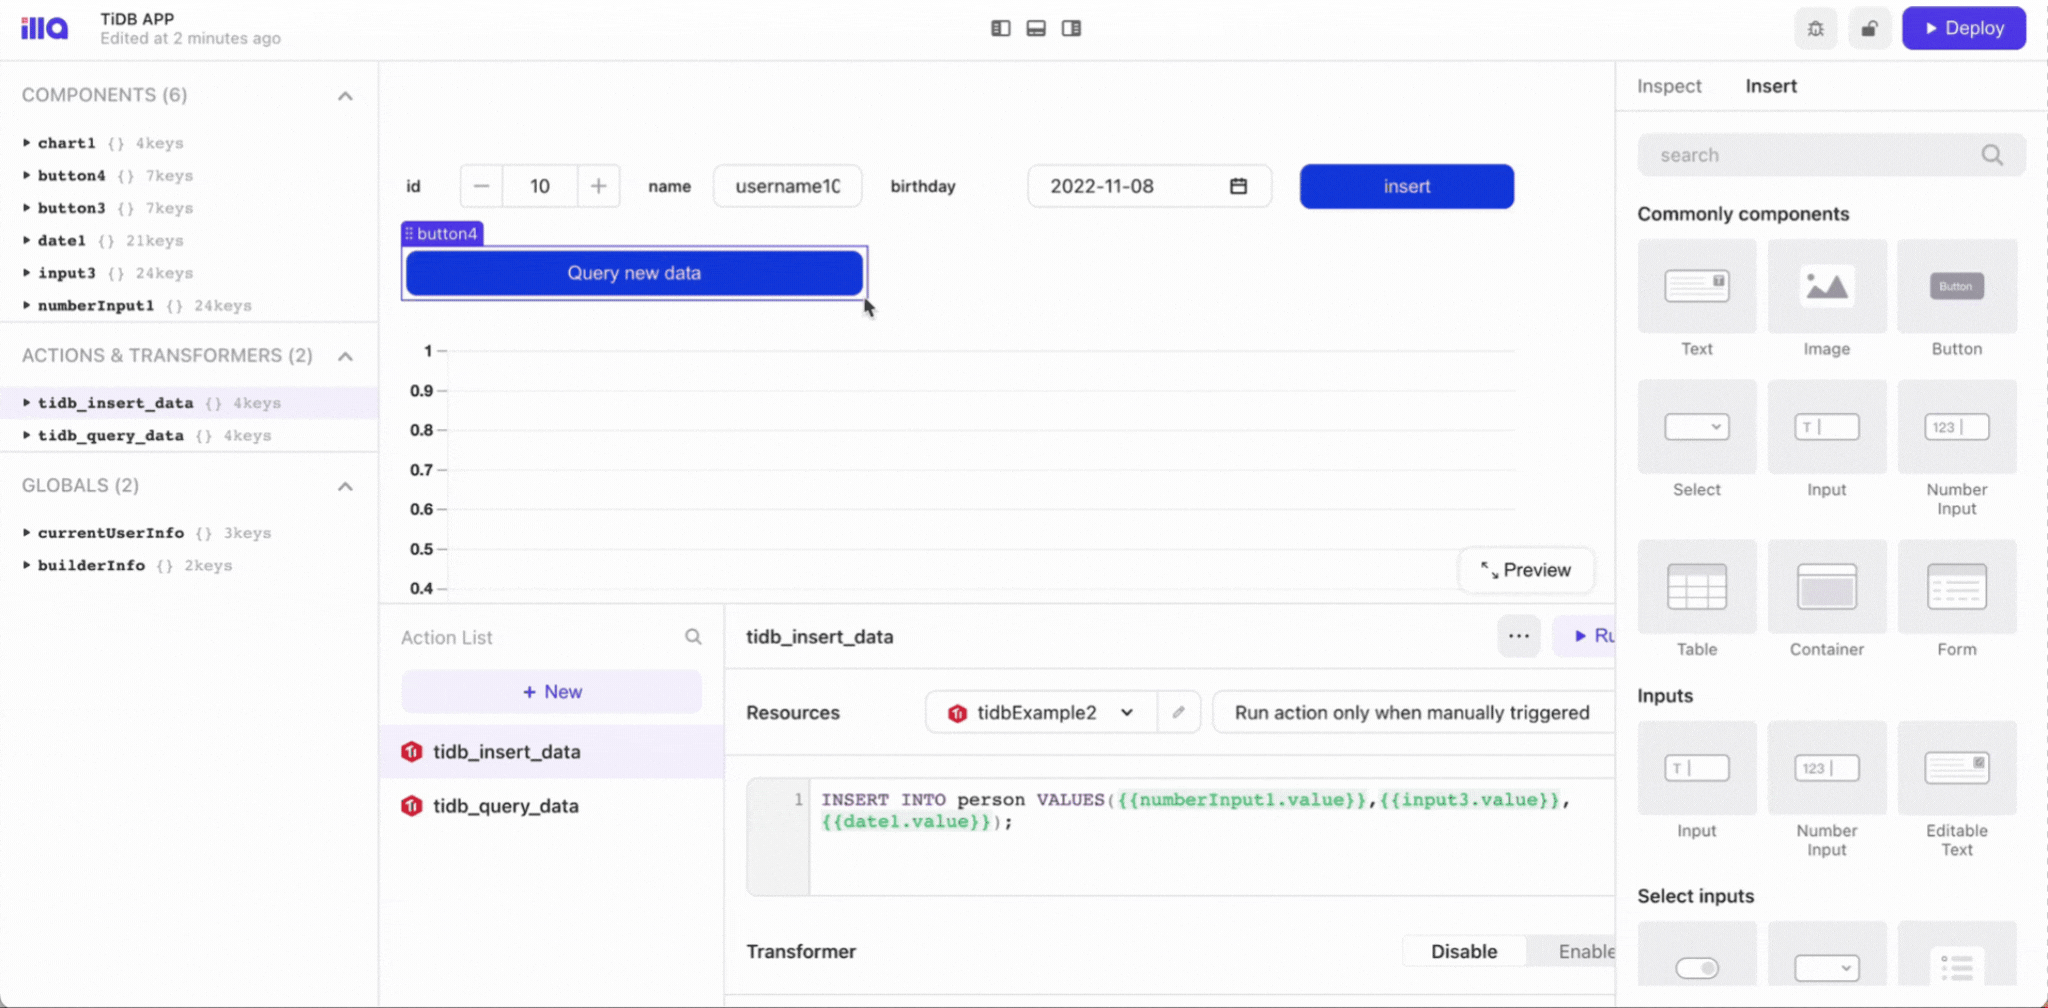
- Under the component inspect panel on the right, select and drag the “text” and “input” components to the canvas in the middle.
- Create and save the required actions. You can refer to the component or action data by typing “{{“. Here we will create two actions, tidb-query-data and tidb-insert-data, for later use.

Query data from the person table

Insert data to the person table
You have successfully connected the component to the action.
Implement a simple web application with TiDB Cloud
Now that we have everything ready, let’s build a simple web application with the basic components to add, delete, modify, or query the data from a TiDB table.
Create and configure an Insert button
- Click on the Insert button component you just added to enter the Inspect panel on the right.
- Under the Inspect panel, add an event handler, and configure the event handler as:
- Event: Click
- Action: Trigger query
- Query: tidb2

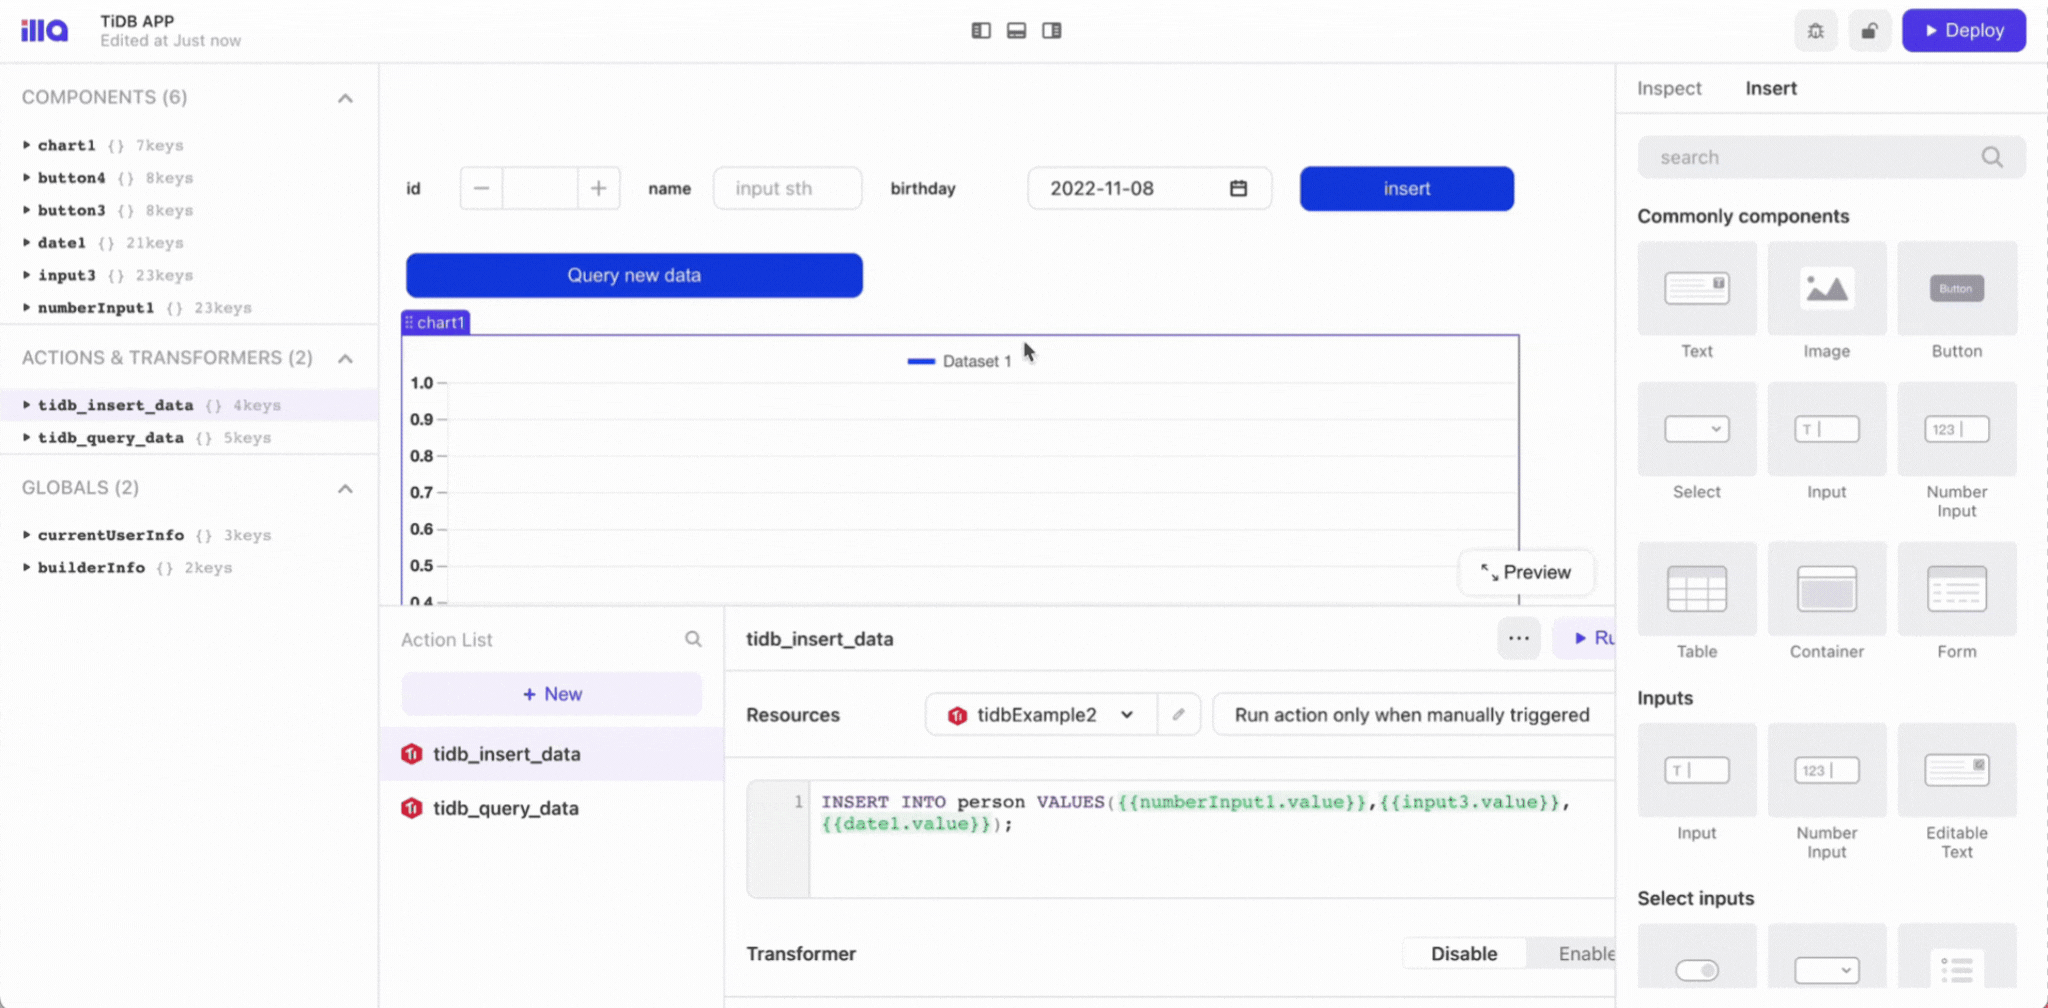
Query data from a table
- Click on the Query new data button you just created. This displays the Inspect panel on the right side of the screen.
- In the Inspect panel, add an event handler, and configure it as follows:
- Event: Click
- Action: Trigger query
- Query: tidb1
Now you will be able to execute the query action against the specified table in TiDB.
Visualize the query as a chart
- In the Inspect panel on the right side, specify the dataset of the chart component to {{tidb1.data}}.
- Adjust the chart component settings such as the chart type, location, and size.
- Adjust the dataset settings such as dataset values and aggregation method. The chart will update as you go.
Summary
In this article, we have implemented a simple TiDB application that inserts new data, executes queries, and displays the query results in charts. Integrating TiDB Cloud and ILLA Builder can make developing your applications much faster and more efficient.
If you encounter any problem during the configuration or migration, you can contact us through our Slack channel, or you can join TiDB Internals to share your thoughts and feedback with us.
Try TiDB Cloud Free Now!
Get the power of a cloud-native, distributed SQL database built for real-time
analytics in a fully managed service.
Keep Reading:
Using Retool and TiDB Cloud to Build a Real-Time Kanban in 30 Minutes
Analytics on TiDB Cloud with Databricks
Build a Better Github Insight Tool in a Week? A True Story
Want to explore TiDB without installing any software? Go to TiDB Playground
Spin up a database with 25 GiB free resources.


TiDB Cloud Dedicated
A fully-managed cloud DBaaS for predictable workloads
TiDB Cloud Starter
A fully-managed cloud DBaaS for auto-scaling workloads